Houseplant Root Rot: Signs, Causes, and How to Save Your Plant
Spot the early signs of root rot, understand what causes it, and follow a step-by-step recovery plan to save your houseplant before it's too late.
Root rot is one of the most common reasons houseplants die. It happens quietly, below the soil surface, and by the time you notice something is wrong above the leaves, the roots may already be in serious trouble.
The good news is that root rot is treatable if you catch it early. Understanding what causes it, how to identify it, and what steps to take can mean the difference between losing a plant and helping it recover.
This guide explains what root rot is, how to spot the early warning signs, and exactly what to do to save your plant.
What Is Root Rot?
Root rot is a condition where a plant’s roots begin to decay, usually because they have been sitting in waterlogged soil for too long. When soil stays wet, the air pockets that roots need to breathe fill with water instead. Without oxygen, the roots begin to suffocate and die.
Once the roots are weakened, fungi and bacteria that naturally exist in soil begin to break down the dead tissue. This is what turns roots from firm and white to soft, brown, and mushy. The most common fungal pathogens involved are species of Pythium, Phytophthora, and Fusarium, but you do not need to know the scientific names to identify the problem. If you want a detailed technical breakdown of these pathogens and how they attack indoor plant roots, the University of Maryland Extension has a thorough resource on the topic.
Root rot can develop in any houseplant, but it is especially common in plants that are kept in pots without drainage holes, watered too frequently, or planted in heavy soil that holds too much moisture.
Early Signs of Root Rot
Root rot is difficult to detect in its earliest stages because the damage happens underground. However, the plant will eventually send signals above the soil line that something is wrong.
Here are the most common above-ground signs of root rot:
- Yellowing lower leaves that start at the base of the plant and work upward
- Wilting or drooping even though the soil feels wet
- Soft or mushy stems near the soil line
- Soil that stays wet for many days after watering
- A sour, musty, or swampy smell coming from the pot
- Stunted growth or leaves that are smaller than usual
- Leaves dropping off without an obvious cause
If you notice two or more of these signs together, especially wet soil combined with yellowing or wilting, root rot is a likely explanation. The only way to confirm it is to remove the plant from its pot and inspect the roots directly.
Healthy Roots vs Rotting Roots
| Characteristic | Healthy Roots | Rotting Roots |
|---|---|---|
| Color | White, cream, or light tan | Brown, dark brown, or black |
| Texture | Firm and slightly springy | Soft, mushy, or slimy |
| Smell | Neutral or earthy | Sour, musty, or rotten |
| Structure | Hold their shape when touched | Fall apart or slide off easily |
| Outer layer | Intact | Sloughs off, leaving a thin inner strand |
What Causes Root Rot?
Root rot almost always traces back to one underlying problem: the roots have been deprived of oxygen for too long. Overwatering is the primary stress factor that predisposes houseplants to root rot. Several common mistakes can lead to this.
Overwatering
The most frequent cause. When you water too often, the soil never has a chance to dry between waterings, and the roots sit in constant moisture. Most houseplants prefer a cycle where the soil dries at least slightly before the next watering. If you are unsure when to water, learning how to water houseplants without overwatering can help you build a better routine.
Pots Without Drainage Holes
A pot without drainage holes traps excess water at the bottom, creating a pool that the roots sit in permanently. Even if you water carefully, some water will always collect at the bottom. Over time, this leads to root rot in almost any plant.
Heavy or Compacted Soil
Some potting mixes hold too much water, especially those designed for outdoor garden use. Indoor plants need a lighter mix that drains well and retains just enough moisture. If your soil has become hard and compacted over time, water may not penetrate evenly, which can create pockets of standing water.
Pot Too Large for the Plant
When a pot is much larger than the plant’s root ball, the excess soil holds moisture that the roots cannot absorb quickly enough. The wet soil stays saturated for too long, and the roots begin to suffocate.
Low Light Slowing Evaporation
Plants in low-light conditions use less water and the soil dries more slowly. A plant that dries out in five days near a bright window might take two weeks in a dim corner. If you water on a fixed schedule regardless of light, you may be overwatering without realizing it. Understanding how much light your houseplants need helps you adjust watering to match.
How to Check for Root Rot
If you suspect root rot, the best thing you can do is inspect the roots directly. Here is how to do it safely.
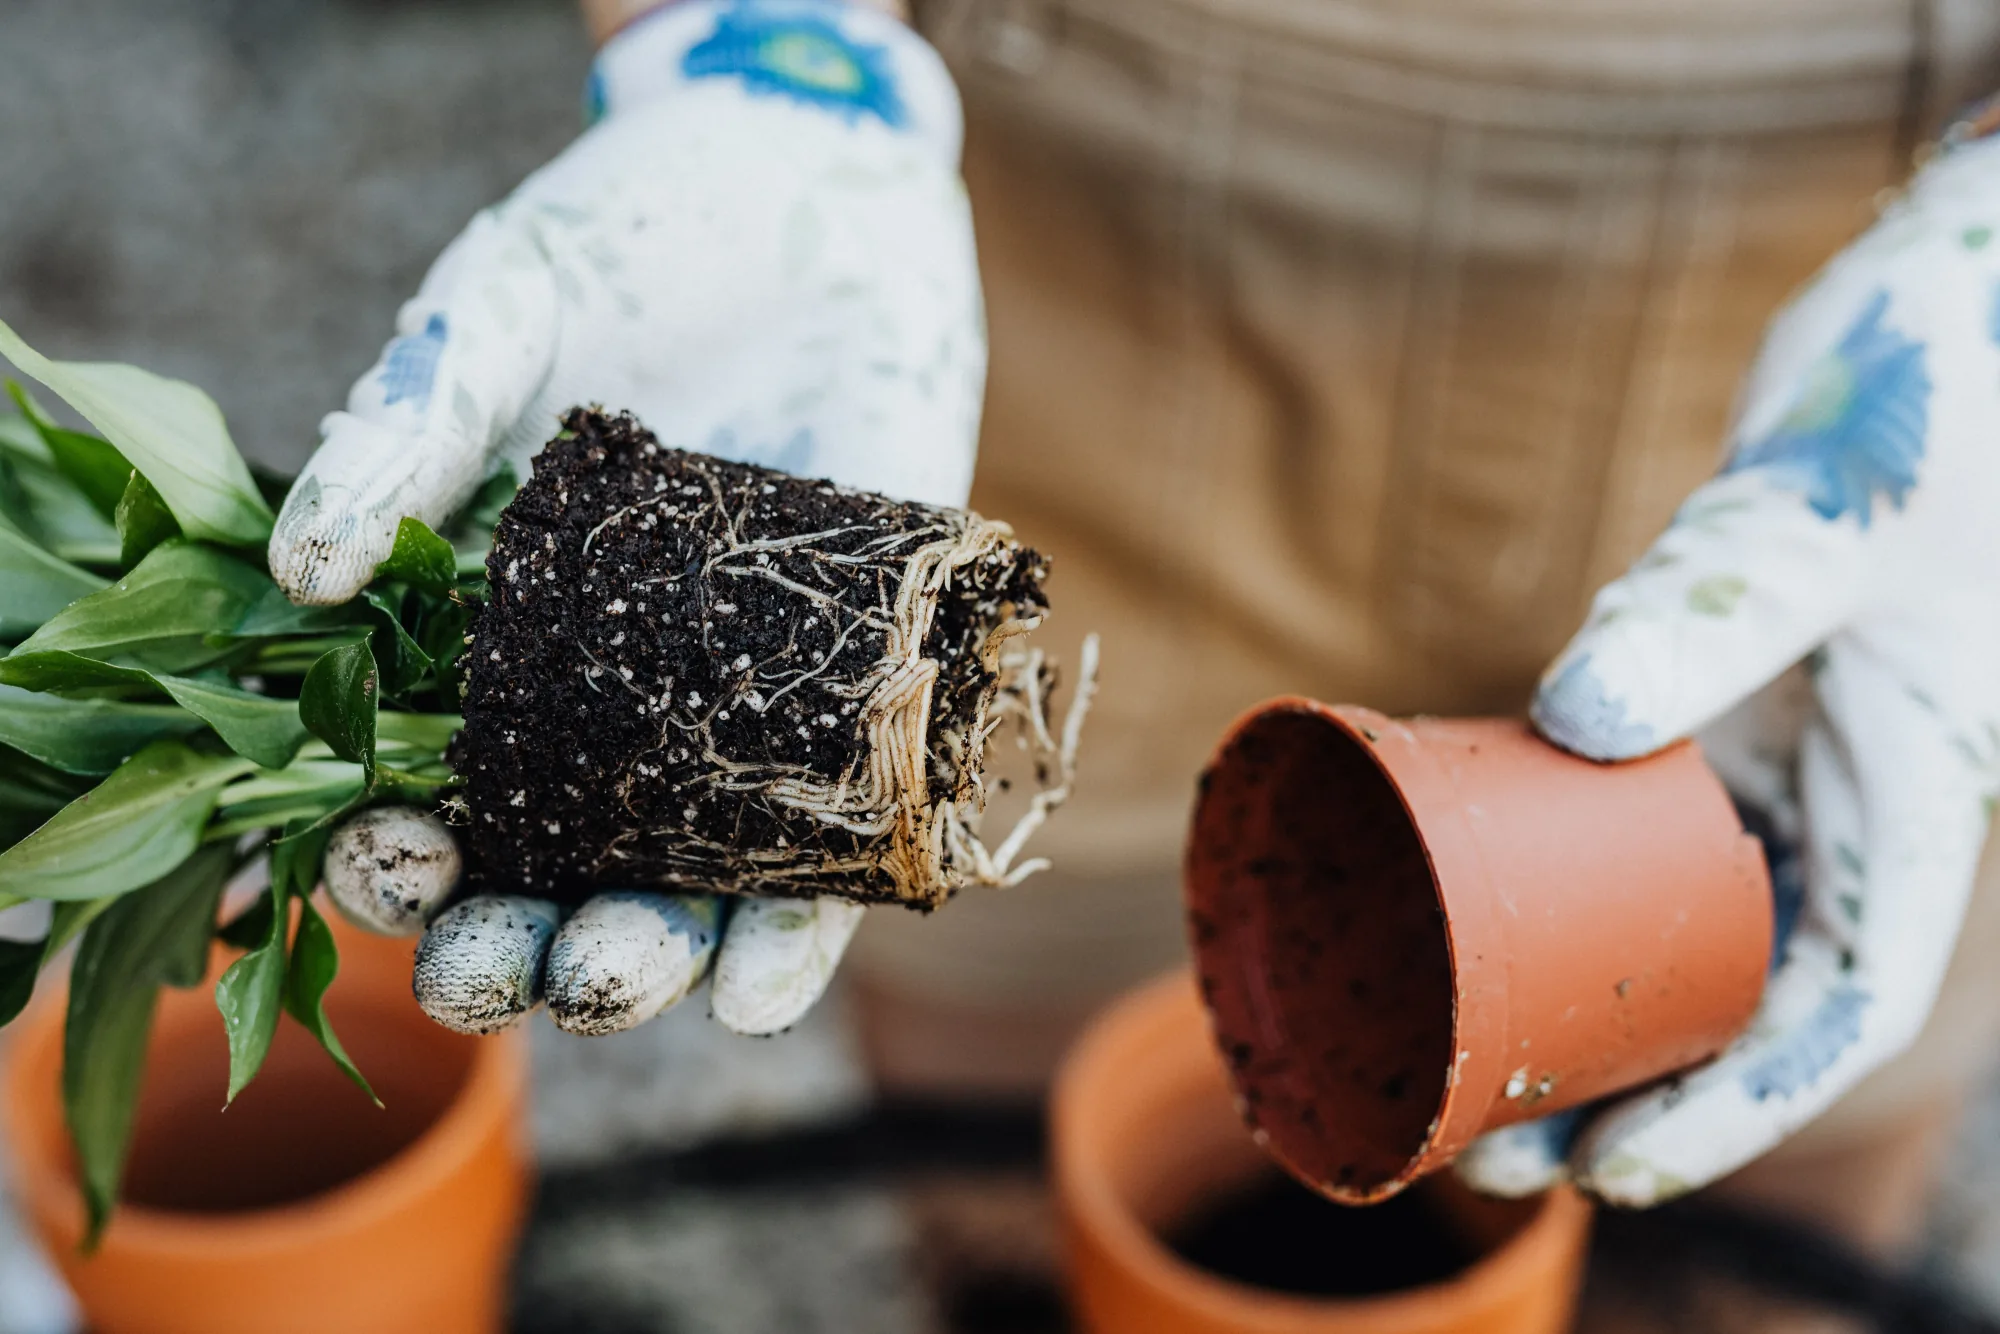
Step 1: Remove the plant from its pot. Gently squeeze the pot or run a knife around the edge to loosen the root ball. Do not pull hard on the stems. Slide the entire root ball out intact.
Step 2: Inspect the roots. Look at the color, texture, and smell. Healthy roots are firm, white or light-colored, and smell earthy. Rotting roots are brown or black, soft, and may smell sour or rotten.
Step 3: Gently remove the old soil. Use your fingers to carefully break away the wet soil from around the roots. You can also rinse the root ball under lukewarm water to remove stubborn soil. This gives you a clear view of the full root system.
Step 4: Assess how much healthy root remains. Look at the proportion of firm, white roots versus soft, brown or black roots. If the majority of roots are still healthy, the plant has a good chance of recovery. If most of the root system is mushy and dark, the plant may be beyond saving.
How to Save a Plant From Root Rot
If you have confirmed root rot, take action immediately. The longer the plant stays in wet, rotting conditions, the less likely it is to recover.
Step 1: Trim all rotten roots. Use clean, sharp scissors or pruning shears to cut away every soft, brown, or black root. Cut back to where the root is firm and white or light-colored. Do not leave any mushy tissue behind, because it will continue to rot and spread.
Sterilize your scissors with rubbing alcohol before and after cutting to avoid spreading pathogens.
Step 2: Consider a protective dip. Some plant owners dip the remaining roots in a diluted hydrogen peroxide solution (one part 3% hydrogen peroxide to two parts water) for 2-3 minutes. This helps kill remaining fungal spores. Others dust the cut root surfaces with cinnamon, which has natural antifungal properties. Neither step is strictly necessary, but both can help reduce the chance of reinfection.
Step 3: Repot in fresh, well-draining soil. Discard all the old soil — it is contaminated. Choose a fresh potting mix that suits the plant species. For most houseplants, a general-purpose indoor potting mix with added perlite works well. If you are new to repotting, follow this step-by-step repotting guide for the full process.
Step 4: Use a clean pot with drainage holes. If you want to reuse the same pot, wash it thoroughly with soap and water, then rinse with a diluted bleach solution (one part bleach to nine parts water). Make sure the pot has at least one drainage hole. Choose a pot that is only slightly larger than the remaining root ball — going too large increases the risk of the problem recurring.
Step 5: Water sparingly for the first two to three weeks. After root trimming, the plant has fewer roots to absorb water, so it needs less moisture than before. Water lightly to settle the new soil, then wait until the top few inches of soil are dry before watering again. Do not fertilize during this recovery period.
Step 6: Place in appropriate light and monitor. Put the plant in a spot with the right light level for its species. Avoid direct sun, which can stress a recovering plant. Watch for new growth over the next 2-6 weeks. Fresh white roots, new leaves, or firmer stems are all signs that the plant is recovering.
Can Root Rot Be Reversed?
Whether a plant can recover from root rot depends on how much healthy root remains after trimming.
If you caught the problem early and the majority of the root system is still firm and healthy, the plant has a strong chance of full recovery. Within a few weeks, new roots should begin growing from the remaining healthy tissue.
If you caught it late and most of the roots were already mushy and dark, recovery is more difficult. Plants with less than 25-30% of their root system remaining after trimming may not be able to absorb enough water and nutrients to sustain themselves.
For vining plants like Pothos, Philodendron, and Tradescantia, propagation is a viable last resort. Take healthy stem cuttings from the upper part of the plant, root them in water or fresh soil, and start over. The original plant may not survive, but you will not lose the plant entirely.
How to Prevent Root Rot
Root rot is much easier to prevent than to treat. Once you understand the causes, the prevention steps are straightforward.
Water only when the top 2-5 cm of soil feels dry. This is the single most important rule. Do not water on a fixed schedule — check the soil first.
Always use pots with drainage holes. If you love a decorative pot without holes, use it as a cachepot: keep the plant in a plastic nursery pot with holes, then set it inside the decorative pot. Empty any water that drains through after watering. The There are a study specifically warns against placing rocks or gravel at the bottom of pots — this actually inhibits drainage rather than improving it.
Use well-draining potting mix. Add perlite or orchid bark to standard potting mix if it holds too much water. Avoid heavy garden soil for indoor plants.
Match pot size to the plant. When repotting, choose a pot that is only 2-5 cm wider than the current root ball. Going too large leaves excess wet soil around the roots.
Adjust watering seasonally. Plants use less water in winter when growth slows and light levels drop. Reduce watering frequency accordingly.
Check for compacted soil. If water runs down the sides of the pot without soaking in, the soil may be hydrophobic or compacted. It may be time to repot.
FAQs About Root Rot
Can a plant recover from root rot?
Yes, if the root rot is caught early and enough healthy root remains after trimming. Remove all rotten roots, repot in fresh soil, and water sparingly during recovery. New roots should begin growing within 2-6 weeks.
How long does it take for a plant to recover from root rot?
Most plants show signs of recovery within 2-6 weeks. You may notice new growth, firmer stems, or improved leaf color. Full recovery, where the root system has regrown to a normal size, can take several months.
Should I repot a plant with root rot?
Yes. Repotting is an essential part of treating root rot. The old soil is contaminated with fungal pathogens, and the plant needs fresh, well-draining soil and a clean pot to recover. Do not skip this step.
Is root rot contagious to other plants?
The fungal pathogens that cause root rot can spread through shared water, contaminated soil, or unwashed tools and pots. If one plant has root rot, quarantine it from other plants, sterilize your tools after working on it, and do not reuse its soil or pot without thorough cleaning.
What does root rot smell like?
Root rot typically produces a sour, musty, or swampy odor. If your plant’s soil smells like a swamp or rotting vegetation, that is a strong indicator that roots are decaying below the surface.
Save Your Plants Before It’s Too Late
Root rot can feel alarming, but it is one of the most preventable houseplant problems. Water only when the soil needs it, use pots with drainage, and check on your plants regularly. If you catch root rot early, most plants can be saved.
Looking for plants that match your home’s light and your watering habits? Try the House Plant Finder quiz to discover indoor plants that fit your real conditions — no guesswork required.