Indoor Plant Wall Care: How to Keep a Living Wall Healthy
Indoor plant wall care starts with light, watering access, drainage, wall protection, and plant choice. Learn how to make a living wall easier to maintain.
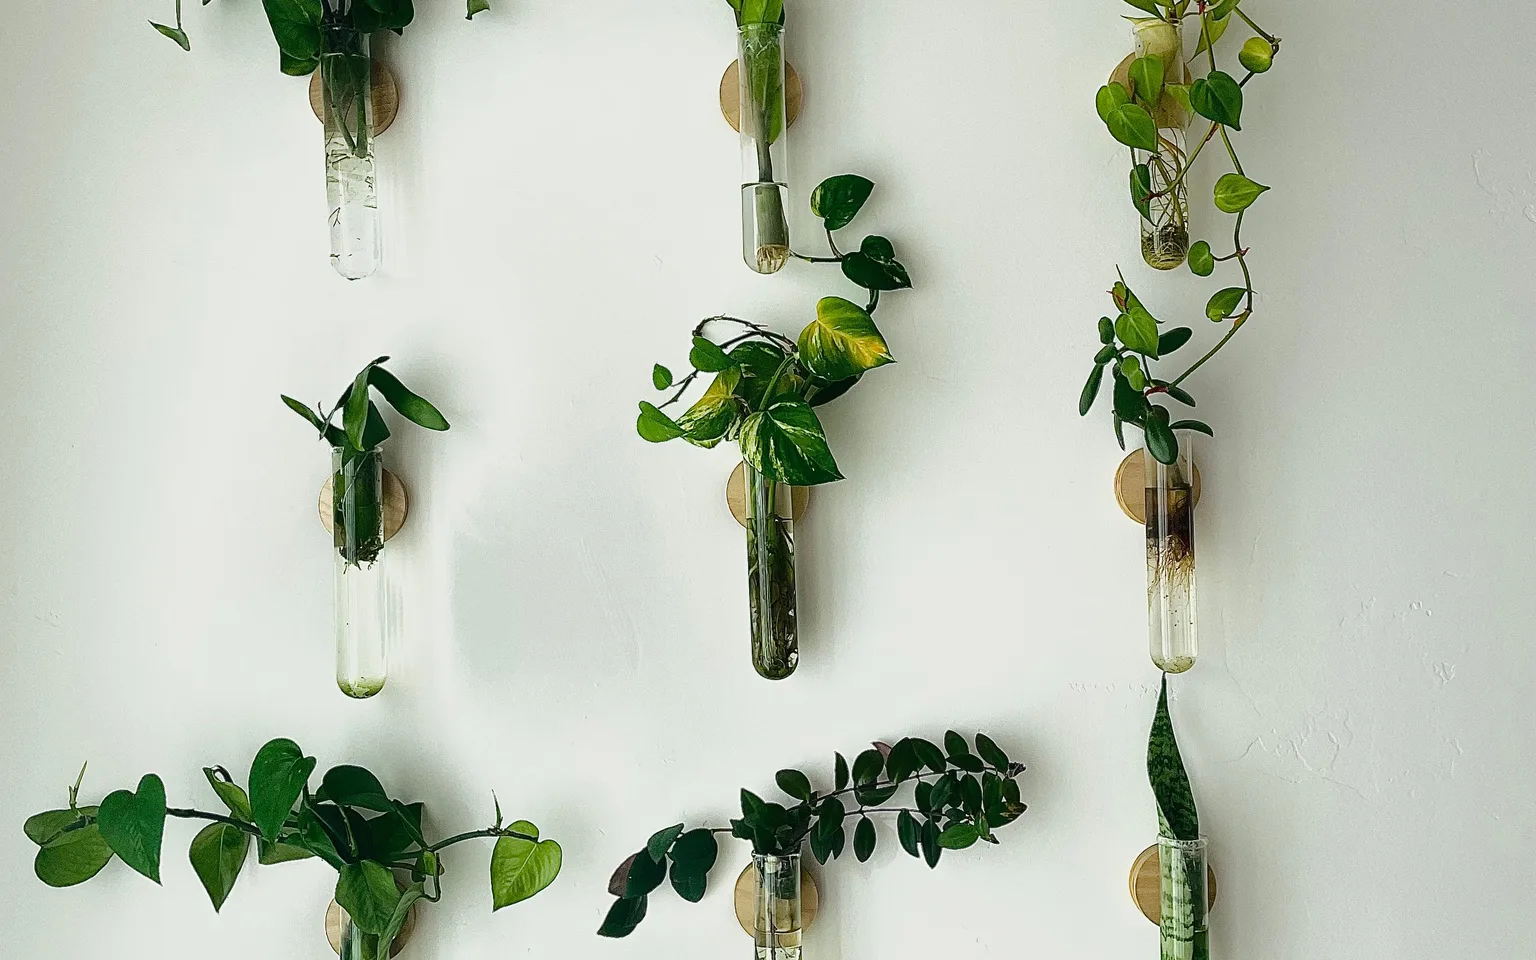
Indoor plant wall care is less about hanging a lot of plants on a wall and more about building a system you can actually maintain. A living wall can look dramatic for a few weeks, then decline quickly if the light is uneven, the watering method is awkward, or water collects where it should not.
Recent public Reddit discussions about a home living wall and a plant wall rating post show why indoor plant walls keep getting attention. They are visually strong, space-efficient, and more personal than a standard shelf. The practical question is whether the setup can stay healthy after the first burst of excitement.
Use these rules before you build, buy, or expand an indoor plant wall.
Indoor Plant Wall Care Starts With Light
An indoor plant wall usually has uneven light. The top row may receive more light than the lower row. The side closest to a window may grow faster than the side in the corner. Leaves can shade each other once the wall fills in.
Before choosing plants, watch the wall for a full day. Notice where direct sun lands, where bright indirect light reaches, and where the wall stays dim. If only one section gets useful light, treat the wall as multiple microclimates rather than one planting zone.
Low-light plants can tolerate dimmer spots, but low light does not mean no light. If the wall is far from windows, a grow light may be the difference between steady growth and slow decline. A living wall placed only for decor, without light planning, is likely to become a rotating display of stressed plants.
For plant choices that tolerate darker rooms better, the same logic from our low-light houseplants guide applies: choose tougher plants, water less often, and expect slower growth.
Plan the Watering Method Before You Add Plants
Watering is the biggest maintenance problem in indoor plant wall care. A normal potted plant can be carried to a sink, watered thoroughly, and left to drain. A wall-mounted plant may be harder to reach, harder to remove, and easier to overwater in place.
There are two safer approaches for a home plant wall:
- Use removable inner pots so each plant can be watered and drained separately.
- Use a real living wall system with a designed irrigation and drainage path.
The first approach is simpler for most homes. Each plant stays in its own nursery pot or small insert. You lift it out, check the soil, water if needed, let it drain, and return it to the wall. This takes more time than watering a shelf, but it gives you control.
The second approach is more like a built-in system. It can work well, but it needs planning for water movement, overflow, access, and wall protection. If a system hides the roots and drainage completely, it may be difficult to diagnose problems until leaves are already yellowing.
Drainage and Wall Protection Are Non-Negotiable
Any plant wall puts water close to a wall surface. That makes drainage and wall protection part of the plant care plan, not a construction detail to think about later.
Check whether water can escape from each pot without touching drywall, paint, wood, or flooring. If the plants sit inside decorative holders, remove each inner pot after watering and empty any standing water. Hidden water at the bottom of a cachepot can keep roots wet for days.
The same risk appears in ordinary planters without drainage. If you use decorative wall pots, the advice from our pots without drainage holes guide still applies: the outer pot can be decorative, but the root zone needs a way to drain.
Look for early warning signs:
- Damp marks on the wall
- Water collecting below the wall
- Sour-smelling potting mix
- Yellowing lower leaves
- Fungus gnats around the wall
- Roots staying wet even when the top soil looks dry
If one section repeatedly stays wet, do not keep replacing plants in that same spot. Fix the drainage or watering routine first.
Choose Plants That Can Be Replaced and Trimmed
An indoor plant wall should use plants that can recover from pruning, tolerate some handling, and be replaced without disrupting the whole display. This is not the best place for every rare or fragile plant you own.
Good plant wall candidates often include:
| Plant Type | Why It Works | Watch For |
|---|---|---|
| Pothos | Fast, forgiving, easy to trim and propagate | Vines can get leggy if light is weak |
| Heartleaf philodendron | Soft trailing growth and easy shaping | Not pet-safe if chewed |
| Peperomia | Compact size for small wall pockets | Can rot if kept too wet |
| Spider plant | Recovers well and fills space quickly | Needs drainage and bright indirect light |
| Ferns | Good texture and dense growth | Need more consistent moisture and humidity |
Pothos and heartleaf philodendron are useful because they can be cut back and rooted again. If a section of the wall thins out, cuttings can fill gaps over time. Our Golden Pothos profile and Heartleaf Philodendron profile are good reference points for the type of trailing growth that works well on a wall.
Avoid building the foundation of the wall from plants that resent disturbance, need very stable humidity, or grow too large for the pocket. Alocasia, large Monstera, and high-value collector aroids are usually better as individual specimens.
Keep Humidity Stable, Not Wet
Plant walls can create a more humid pocket of air because many leaves are grouped together. That can help tropical plants, but it can also reduce airflow if the wall becomes too dense.
The goal is not to keep the leaves wet. Wet leaves pressed close to a wall or crowded against other plants can create spots where disease, residue, and pests are harder to notice. There is a practical guide that explains how indoor humidity affects houseplants, and the useful takeaway for a plant wall is stability: reduce extremes, avoid dry blasts from vents, and do not rely on occasional misting as the main humidity strategy.
If your home is dry, use a room humidifier or group compatible plants nearby. If the wall is already dense, trim it enough to let air move around the leaves.
Build in Maintenance Access
A plant wall that is hard to reach will not be checked often enough. That matters because pests, dry pockets, wet pockets, and yellowing leaves often start in hidden places.
Set up the wall so you can reach every plant without a risky climb or a complicated disassembly. If the top row requires a ladder, keep lower-maintenance plants there. If the wall is above furniture, make sure you can still remove pots for watering.
Every two weeks, check:
- Leaf undersides for pests
- Pot bottoms for standing water
- Wall surfaces for moisture marks
- Dry pockets in the potting mix
- Vines that are covering other plants
- Plants that are being shaded by faster growers
This is where modular walls have an advantage. A single struggling plant can be removed, treated, or replaced without disturbing the entire arrangement.
Do Not Let Fast Growers Take Over
Fast-growing vines make a plant wall look full, but they can also shade smaller plants. Pothos and philodendron vines should be trimmed before they cover slower growers. Cut just above a node, then root healthy cuttings if you want to fill another section.
Training vines across the wall can look good, but avoid wrapping them so tightly that you cannot remove pots. A plant wall should stay editable. If maintenance requires untangling half the display, small problems will become bigger ones.
Summary
Indoor plant wall care comes down to five practical questions: does the wall get enough light, can each plant be watered properly, where does extra water go, can you reach every plant, and are the chosen plants easy to trim or replace?
A living wall can be a strong feature in a home, but it should be designed as a care system, not just a photo backdrop. Start with bright indirect light, removable pots, clear drainage, wall protection, and forgiving plants. That gives the wall a much better chance of staying healthy after the first month.